Quiver Photos Guide (V3)
Use this walkthrough to onboard quickly with the desktop app.
- Download and run the desktop app from Releases.
- Choose where Quiver should save downloaded files.
- Connect your Google account when prompted.
- Continue through identify, crawl, and download.
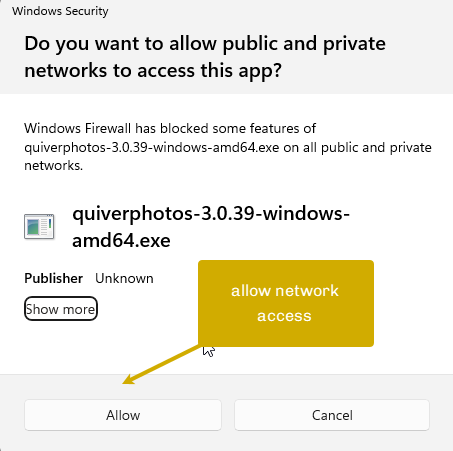
1) Installation
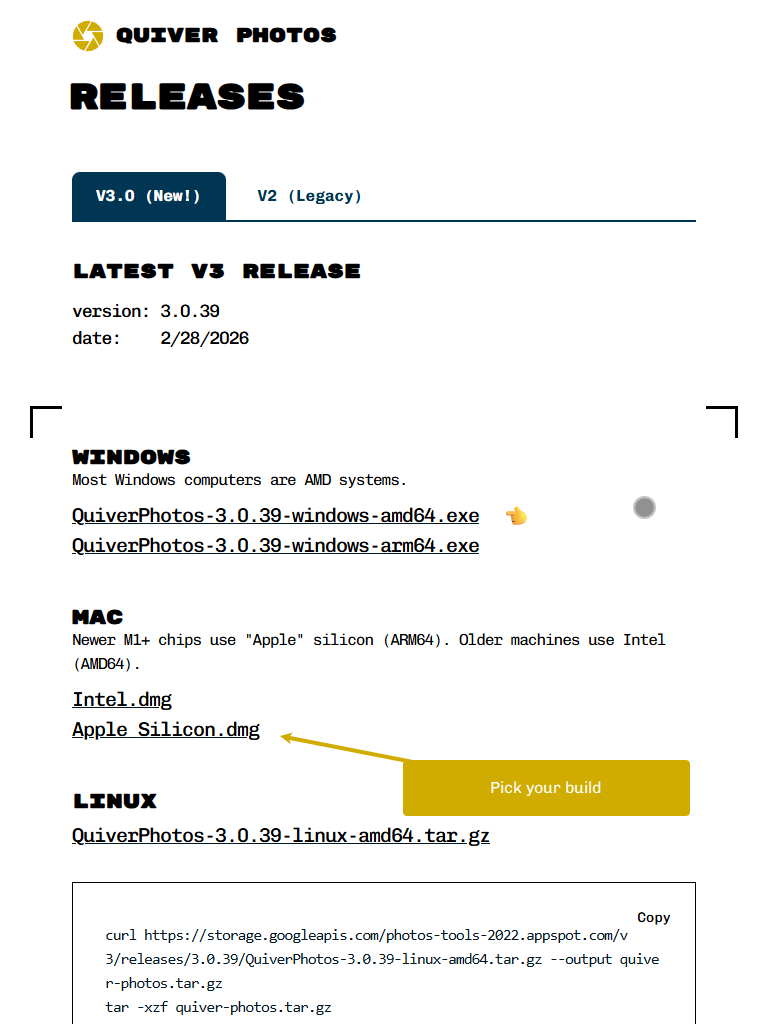
Quiver Photos V3 is a desktop binary for Windows, macOS, and Linux. Download the correct file for your platform, then run it directly.
There is no complex installer for most builds. Open the app and follow the setup wizard.
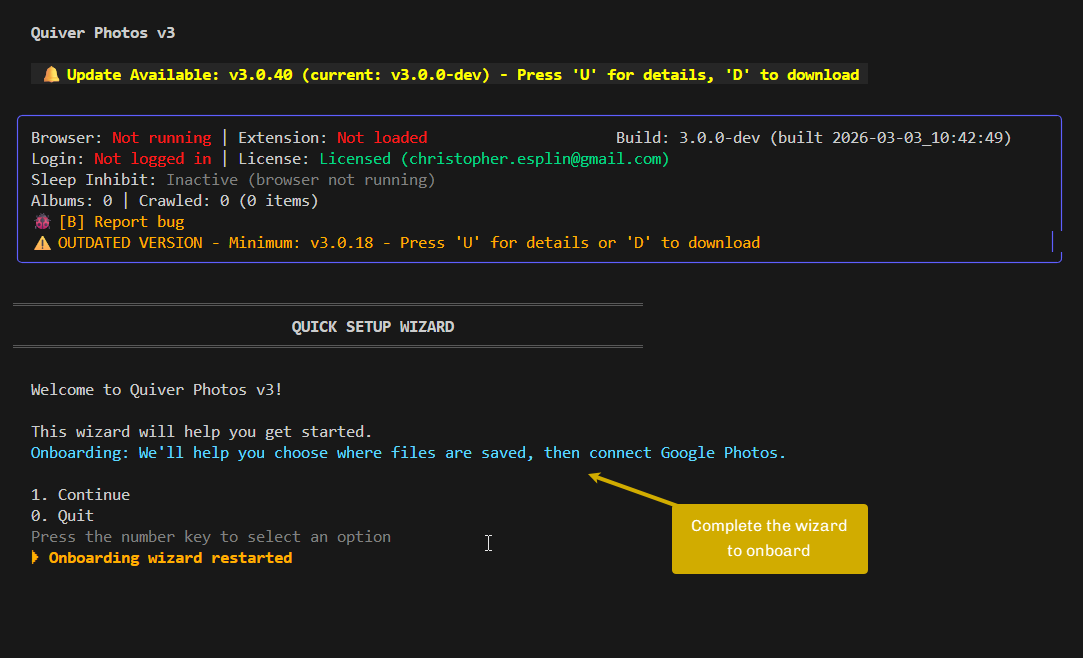
2) Choose Your Download Destination
The most important setup step is selecting your download destination folder.
This folder is where Quiver will write your downloaded photos and videos. You do not need to choose a folder that already has files in it.
Creating a fresh folder such as Quiver Downloads is recommended.
3) Browse Folders in the App (Linux/macOS fallback)
On some systems, native folder picker dialogs may not appear reliably. Quiver includes an in-app folder browser so you can still choose a folder without leaving the TUI.
Use arrow keys to move through folders and press Enter to open a folder. Select the current folder when you reach your desired destination.

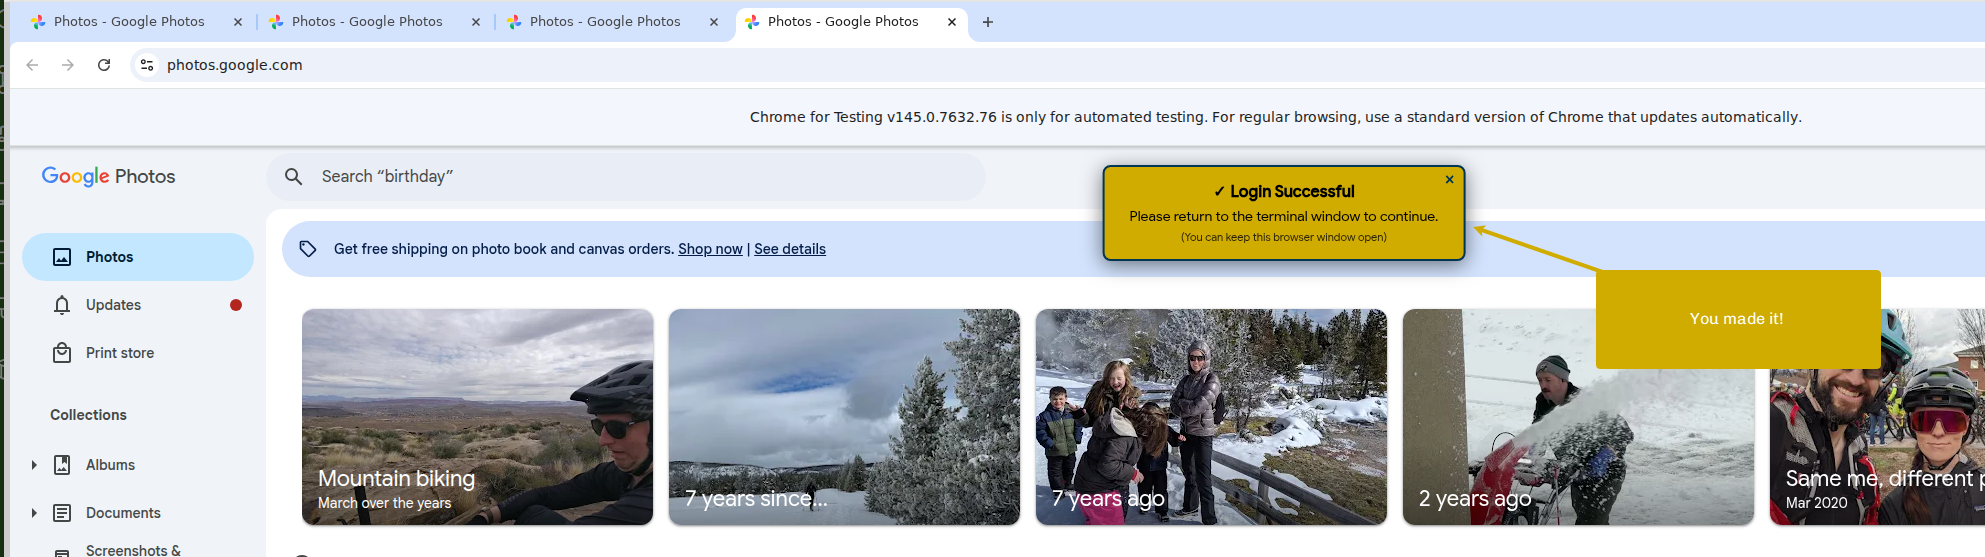
4) Connect to Google Photos
After your destination is set, Quiver prompts you to connect your Google account in the browser.
Quiver uses Google authentication and only requests the access required to read and download your Google Photos library.

5) Continue the Download Workflow
After login is complete, continue through the guided launch and download flow.
In-App Copy Map (for implementation parity)
These are the exact message goals used inline in the TUI:
- Installation intro: welcoming setup message in a dedicated onboarding color.
- Download folder clarification: explicit warning that the folder is a destination, not an existing source folder.
- Filesystem browsing hint: keyboard-first fallback instructions for Linux/macOS.
- Auth guidance: concise Google login explanation near the login/start flow.
Need the previous guide? See Quiver Photos Guide (V2).